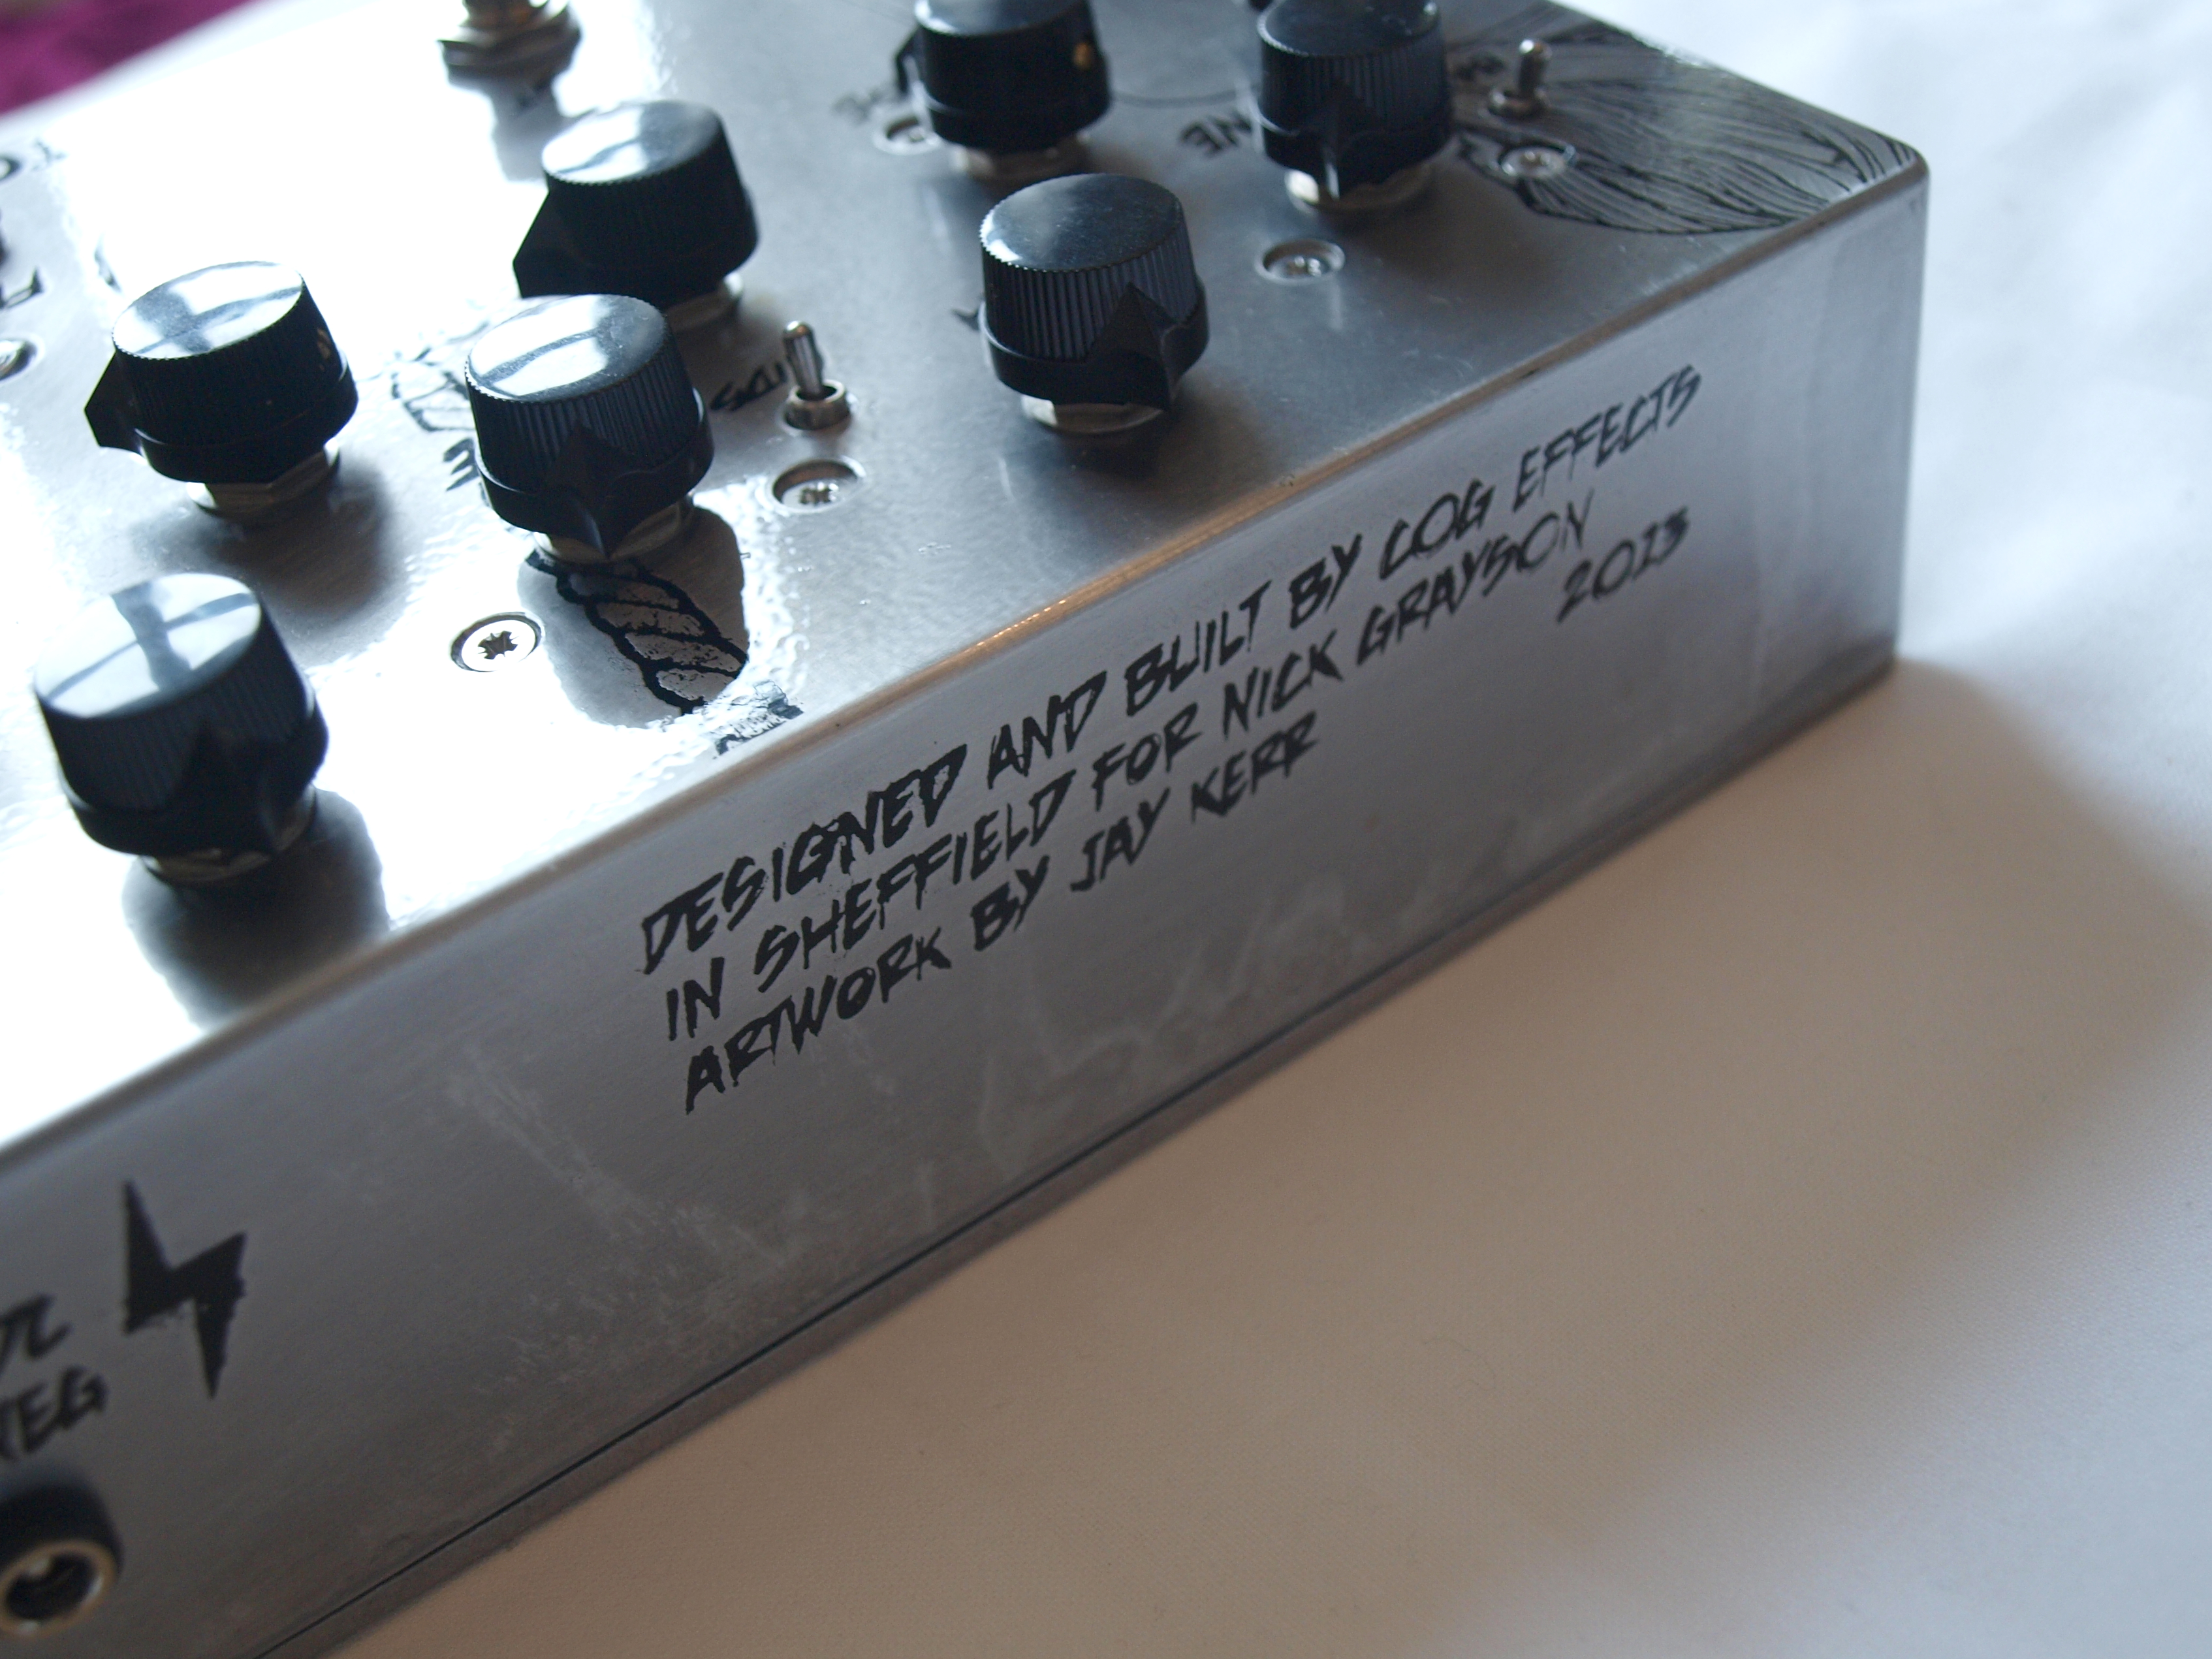
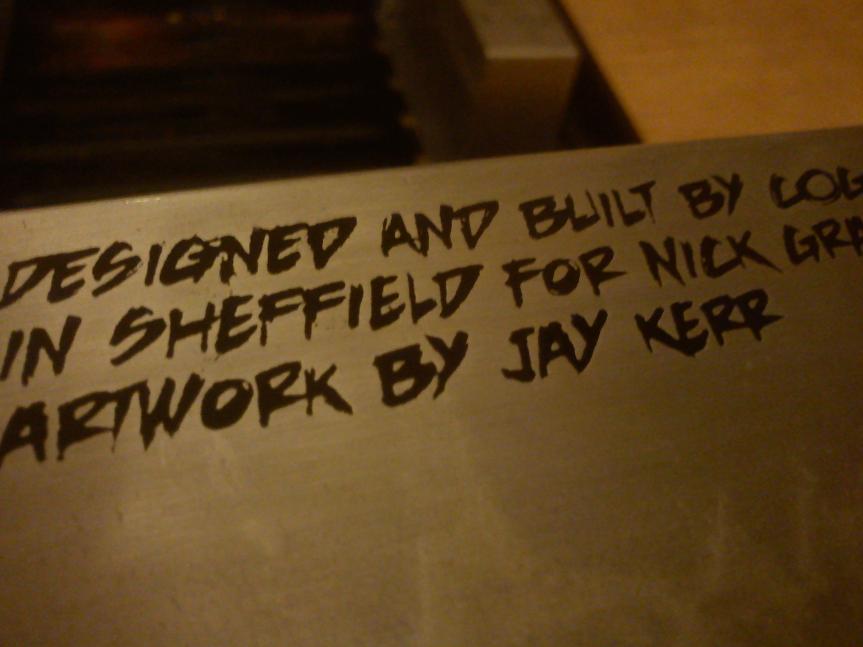
Like Rome - custom routing and dirt box for Nick Grayson
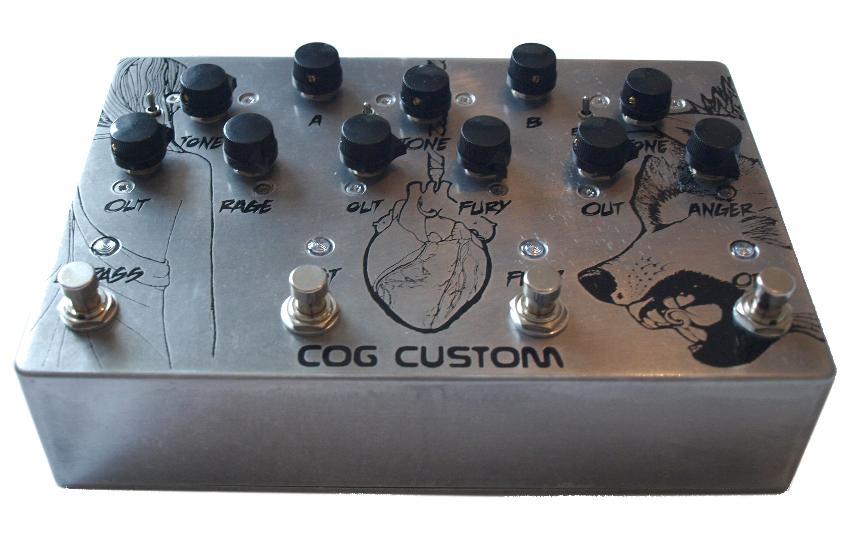
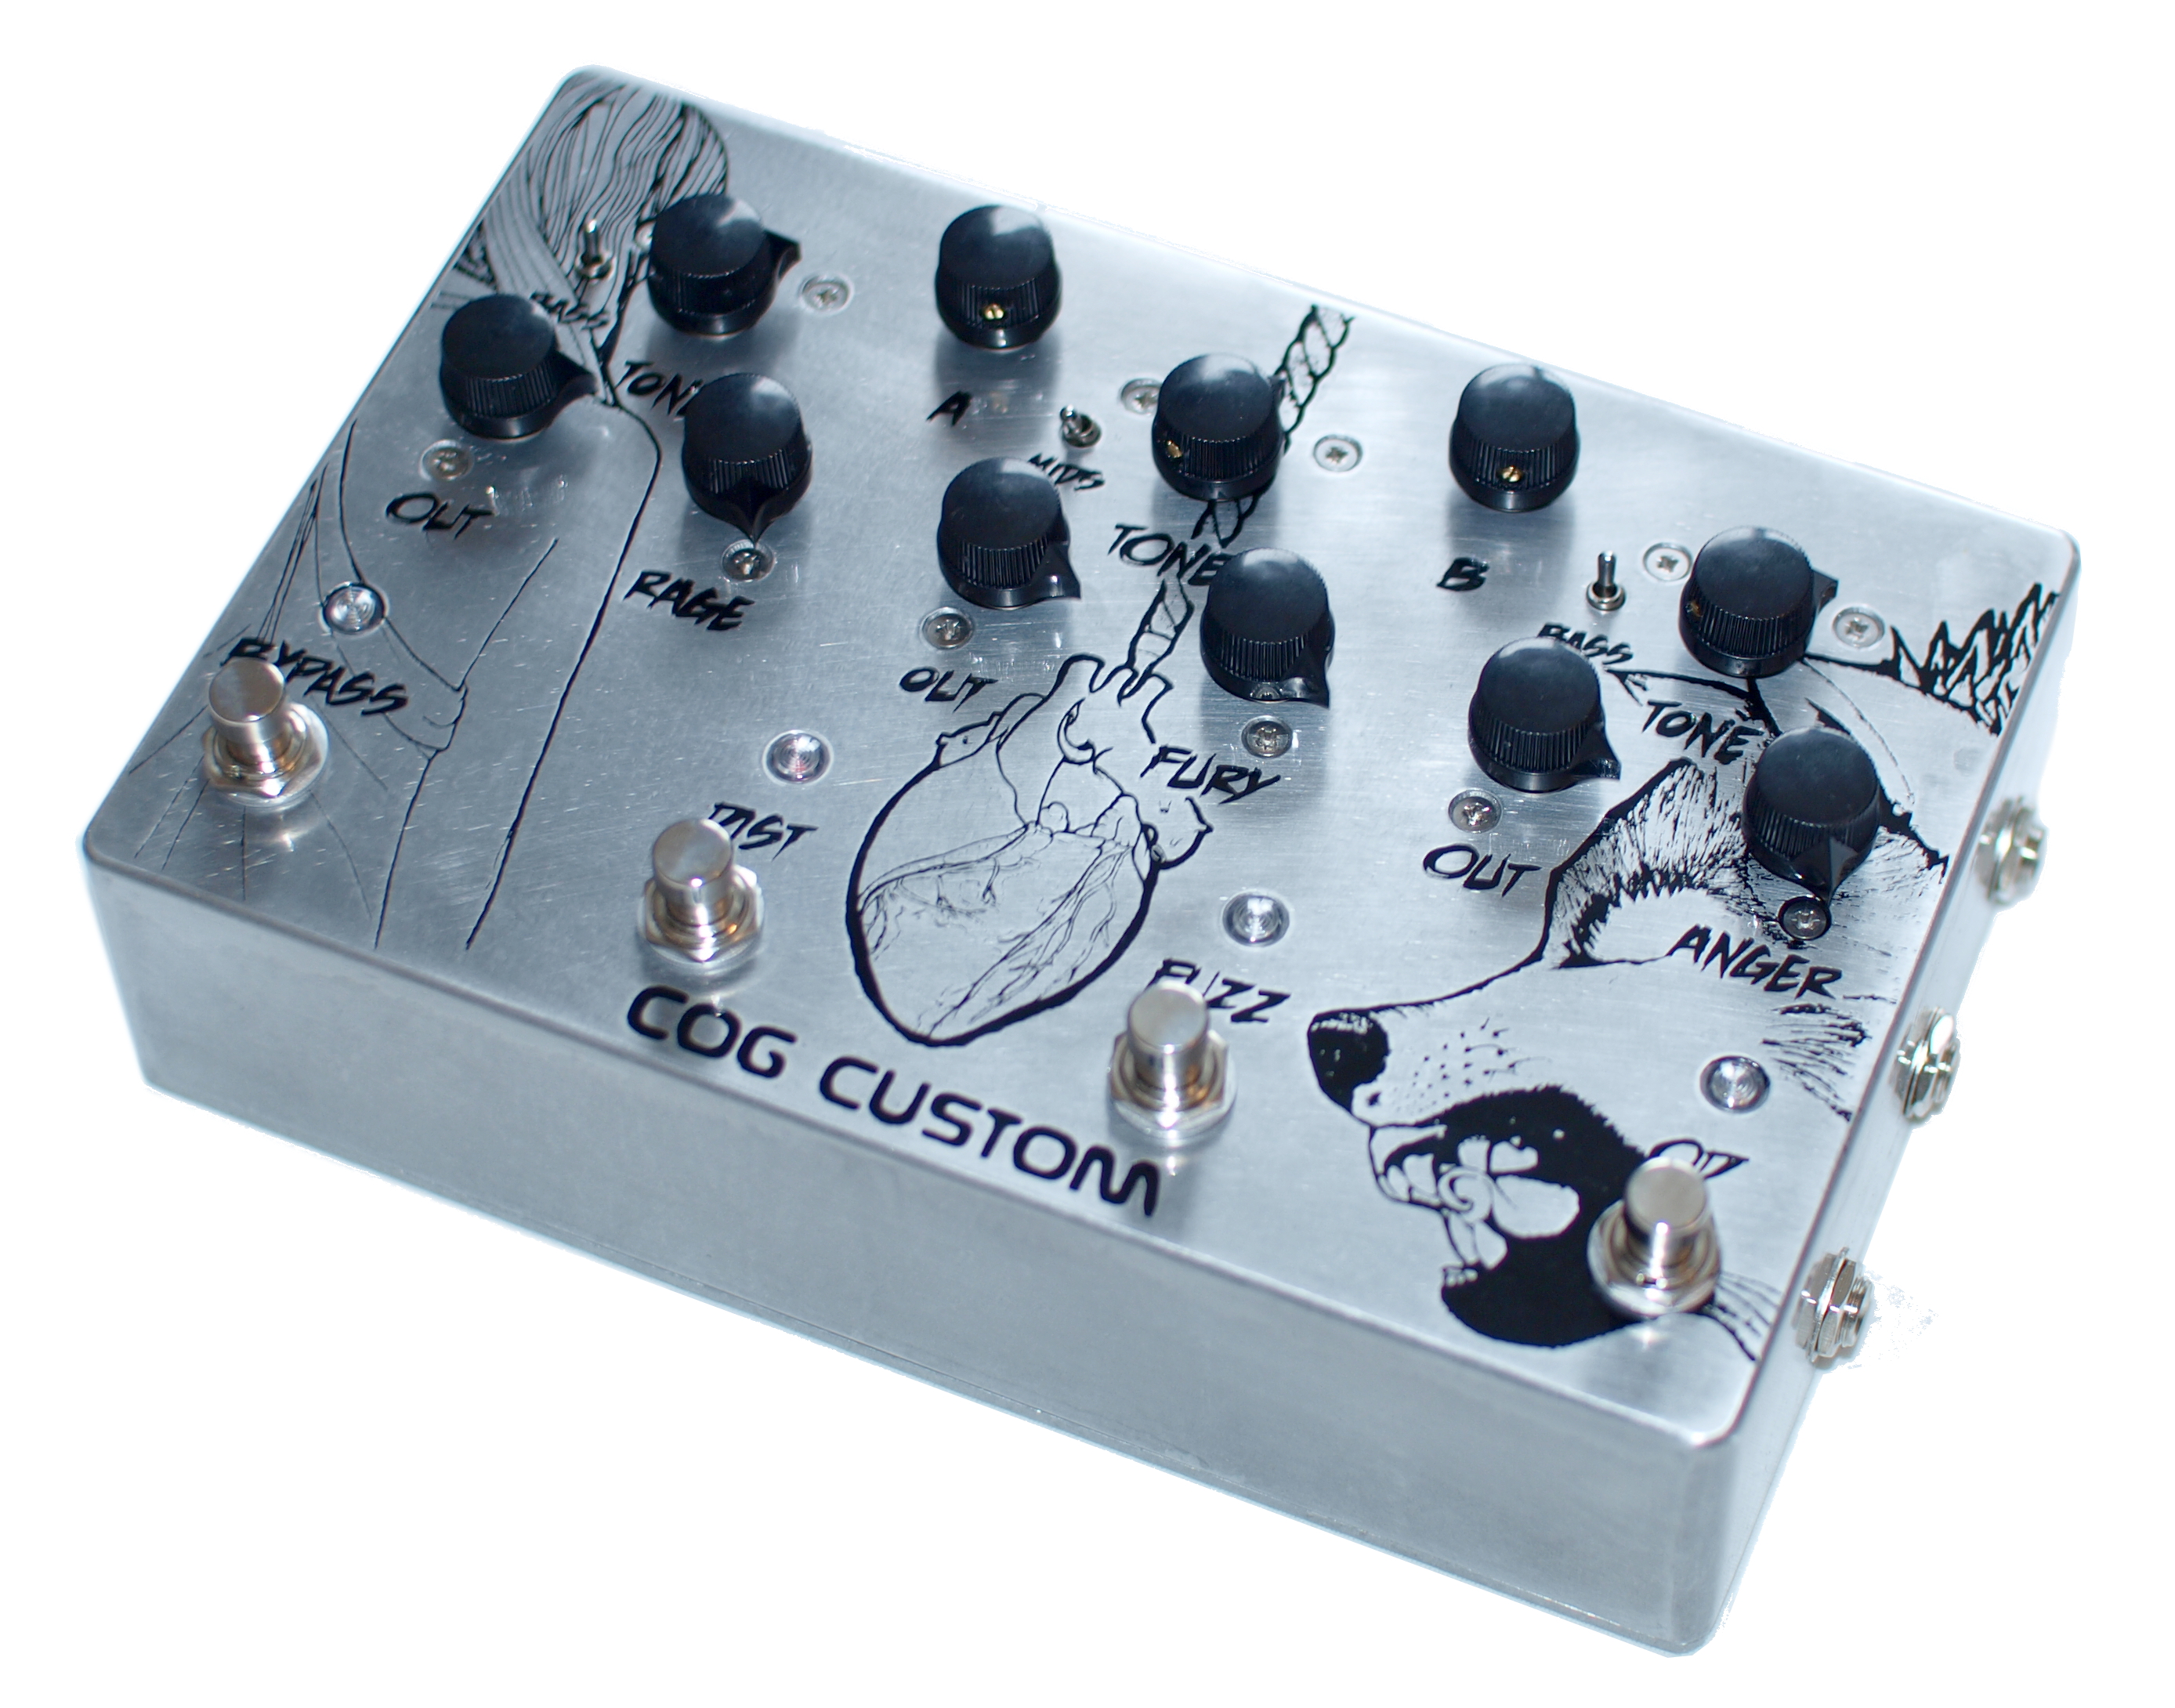
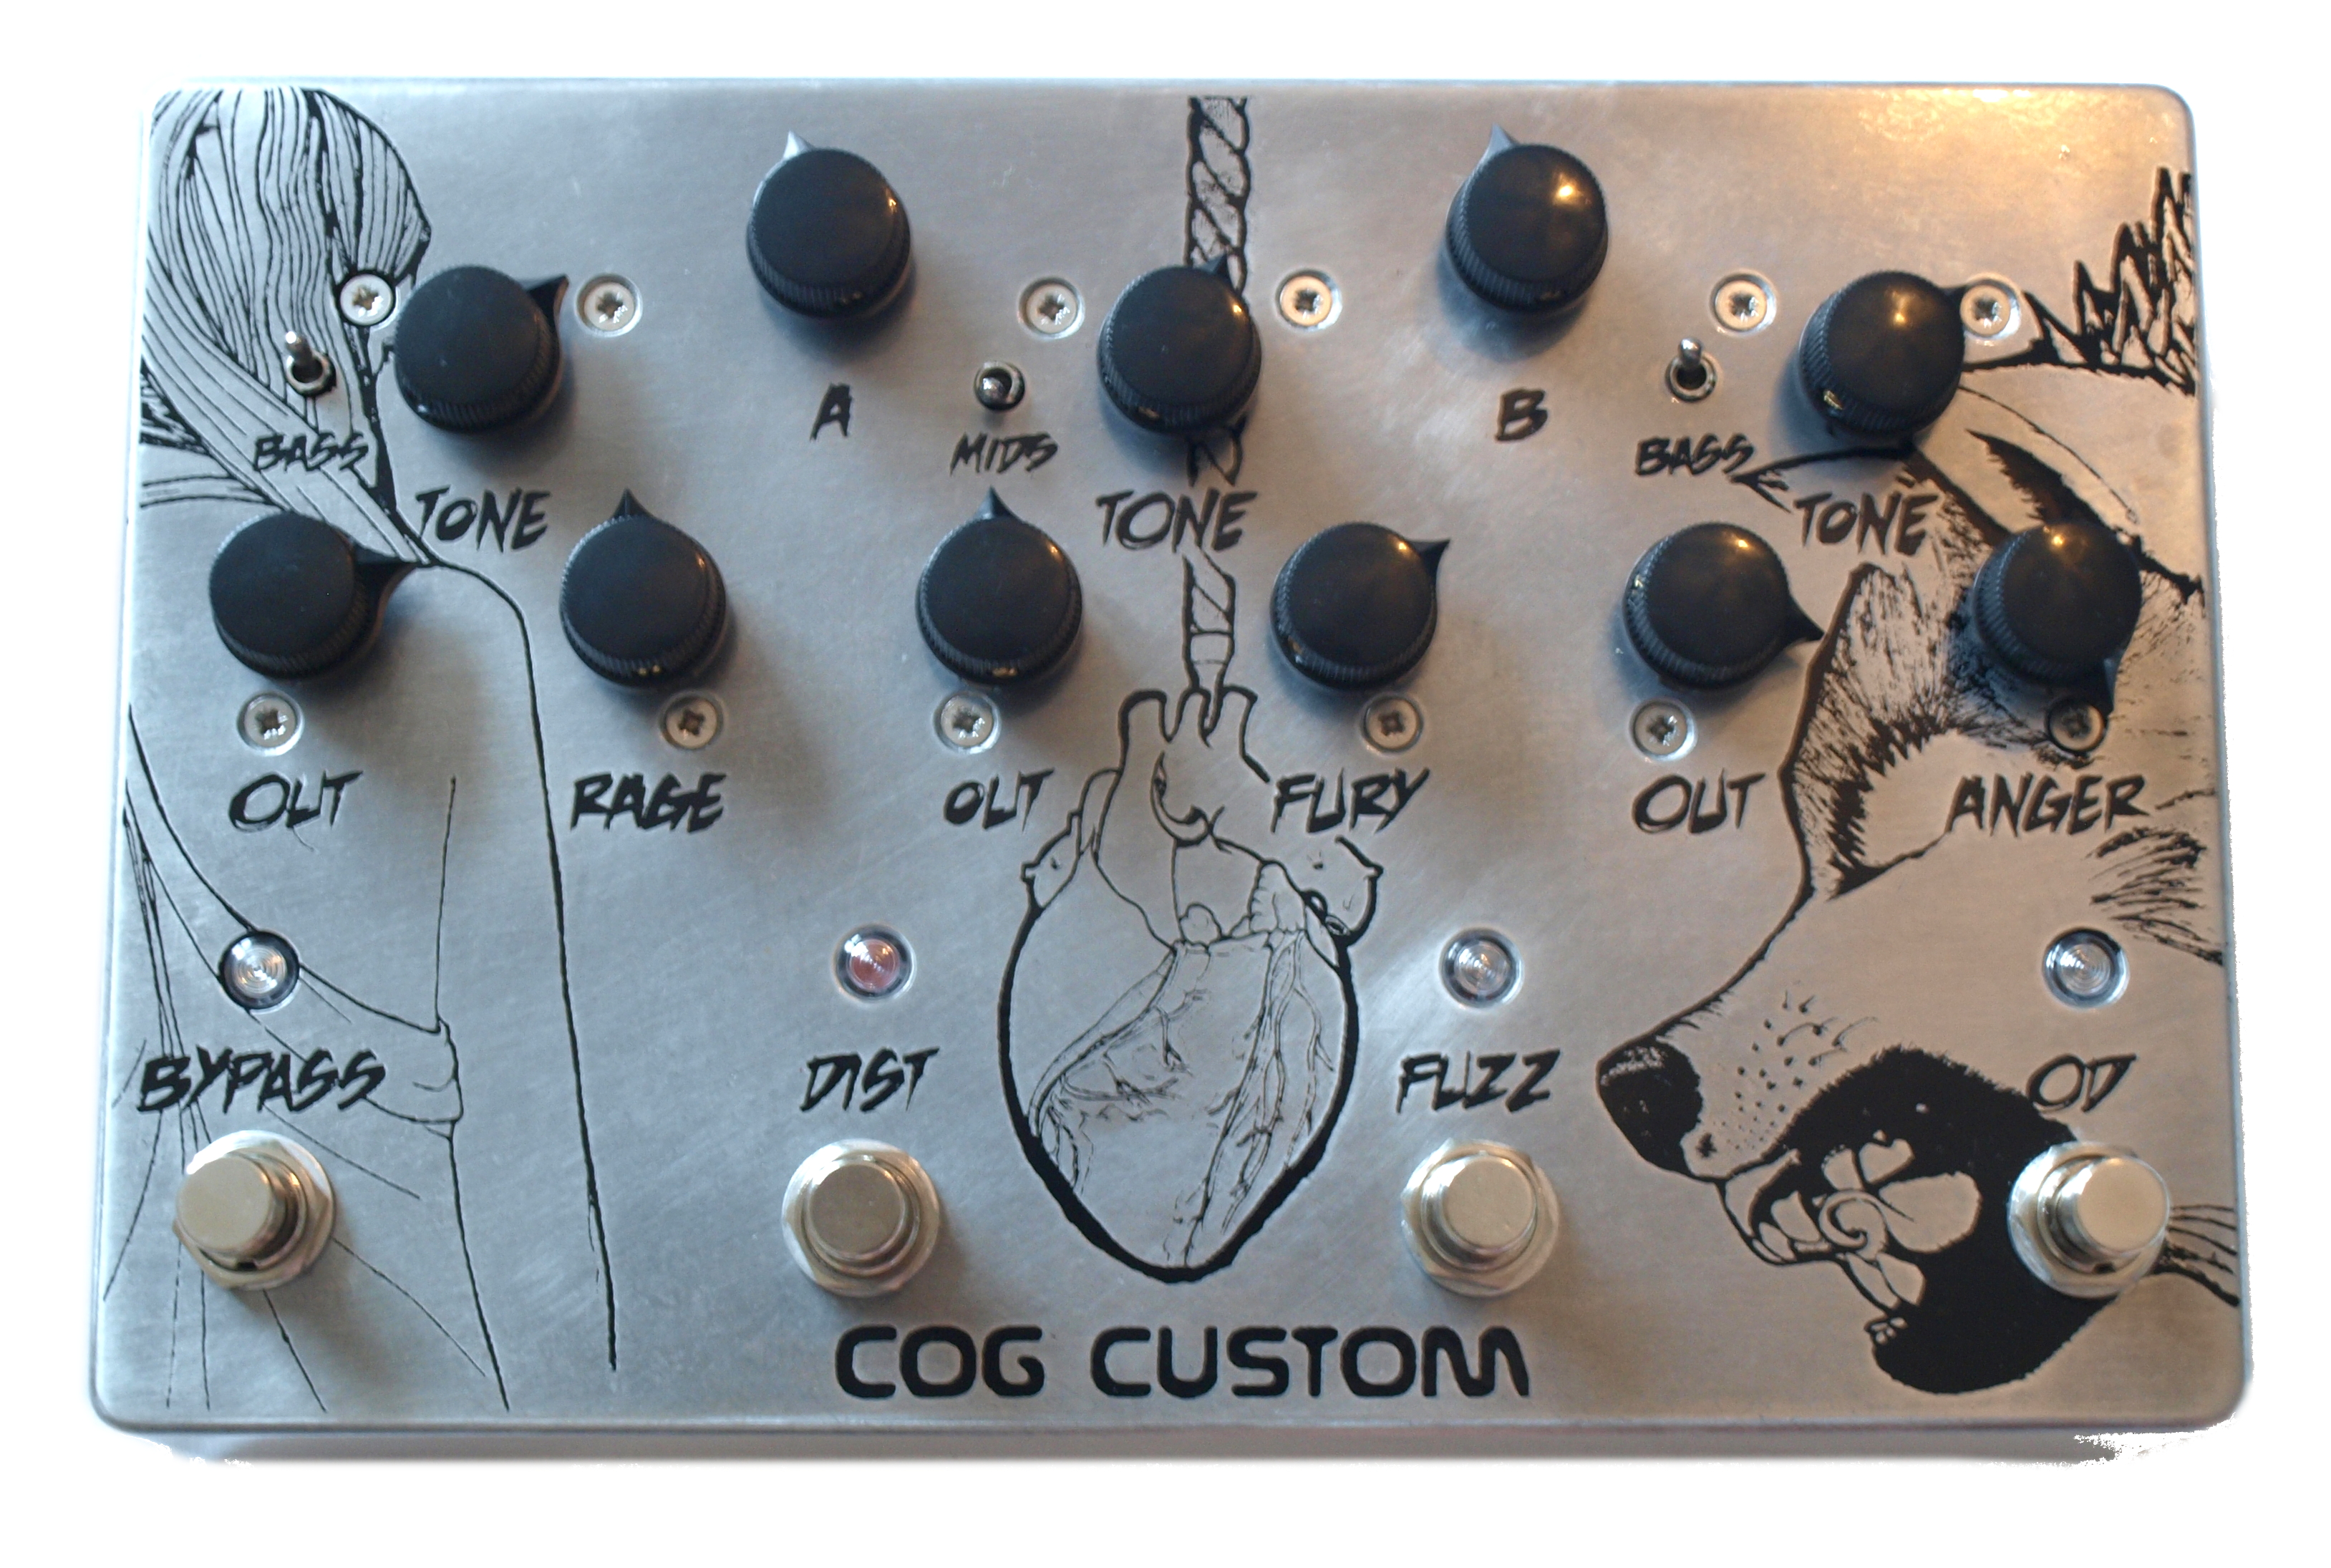
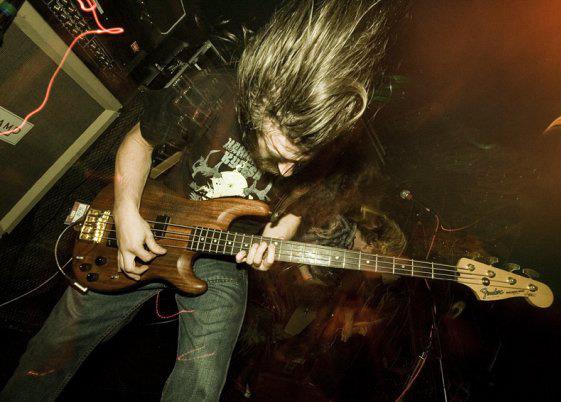
Nick currently holds down the low end for Sheffield metallers LIKE ROME, having previously done the same for The Mirimar Disaster up and down the country on tour with the likes of 65daysofstatic, The Ghost of a Thousand, Baroness and Raging Speedhorn to name but a few. Over the past few months, Nick has helped with the development of the Tarkin, Darklighter and Knightfall and this led to a custom pedal to meet his live demands that consists of all three circuits in one box, blended with his Tech 21 Sansamp Bass Driver. During development this pedal very quickly came to be called The Beast!
Here's what Nick has to say:
"For me it’s all about the right tone for the job, I want to have the bassiest tone possible but still sit well in the mix and not just sound like one unidentifiable note like I see many bands suffer with, there is nothing more frustrating for me than seeing a bassist go hell for leather up and down the fretboard and get nothing out of it past a completely pointless low rumble! If I am playing a note you should all hear it, no matter how fast or where on the bass it should always stand out in the mix. This is one reason I play pick style, the definition and percussive element you can achieve from the levels of attack you can apply whilst playing with a pick makes your amp and distortions much more versatile. 'The more you put in, the more you get out' - simply put.
"Tuning can also go a long way to getting your ‘sound’ just right. I like a really bassy low end and a quite responsive and clear high end (who doesn’t!) in Mirimar to achieve this we adopted a tuning of GADG which gave us a crushing low string but with an ability to keep those high elements really crisp and punchy. It also allowed us to keep relatively thin strings, whilst thick strings are fantastic for beefing up lower frequencies they can easily get muddy when distorted or in the mix so a good balance is important to keep your tone crisp and the lows flattering. I had a set up of G 125 A 85 D 65 G 45.
"Still the real issue for me was getting a great sounding dirty tone whilst not compromising the low end, a tricky job that can see you rattle through tons of pedals just to see if they are better for your needs. I didn’t want to do that, I wanted to choose the pedal with the distortion/gain I wanted and just make it work. The key to this, as many players have found, is a blend unit. Commonly people will use a standard blend unit or perhaps a control board with a number of ‘patches’ for each loop. I like to keep things as simple as I can but without compromising any tone or choice. For this I was using the BOSS LS2 line selector with the 'A & B always on' setting, and ran my sansamp through A and any drives etc through B - this allows me to always have a clean tone running from the Sansamp and I can simply punch on the distortions etc over the top allowing a great full gain sound but with all the low end benefits of my clean tone. The down side to this set up is that when I don’t have any of the line B pedals on I am running a dry signal and blending it with my clean Sansamp signal which I would prefer not to do. THE BEAST will change all this, but I’ll let Tom tell you all about exactly why this is simply the best thing I have ever had made for me and why we came to this particular set up. All I have to say is I was lucky enough to test out a few of his own COG pedals and I straight away took all my other pedals out of the equation. Speaking to Tom about getting these pedals and my current set up led to the creation of THE BEAST, this will completely re-invent my set up and give me the tone and controllability I never dreamed I would have in one box."
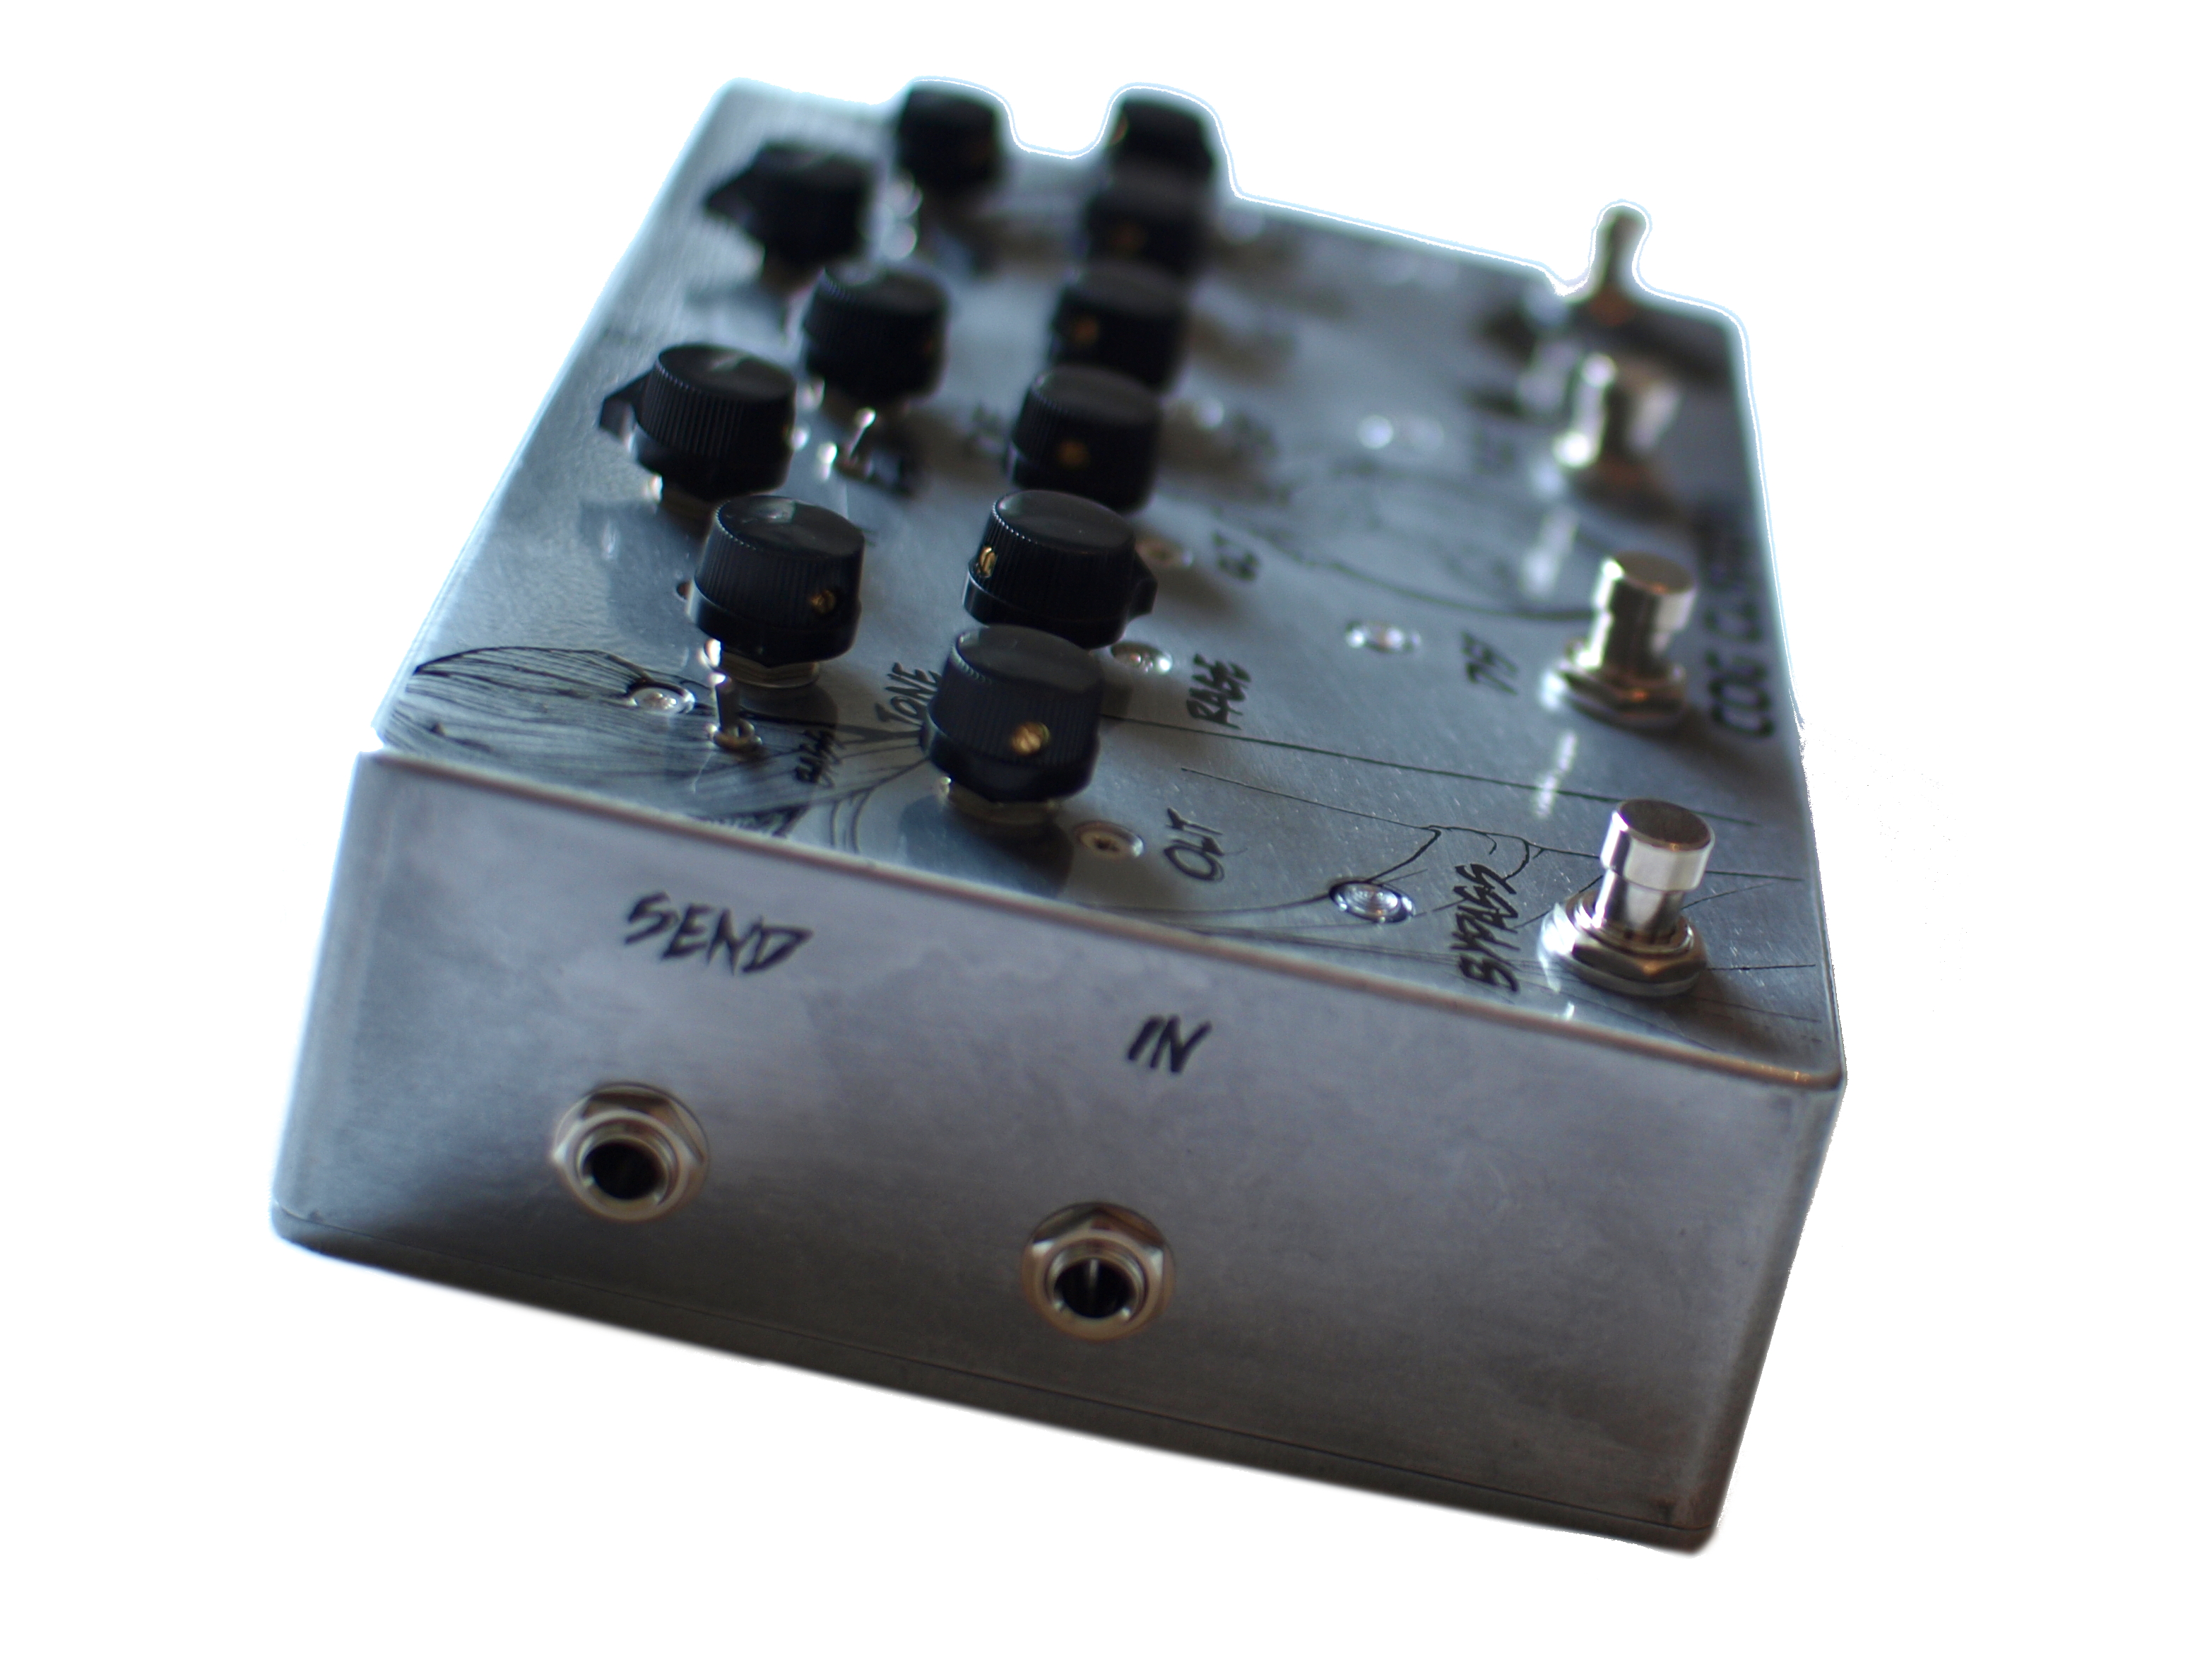
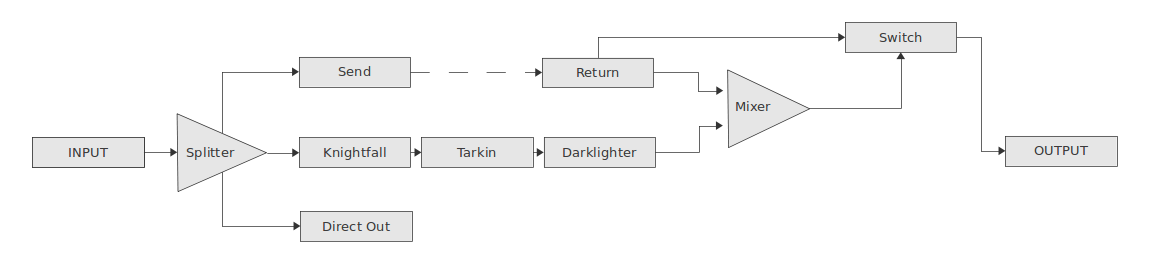
The solution was to put all Nick's dirt in one box, and use high quality buffers to split the signal and route it to an effects send for the Sansamp, the dirt chain, and an additional direct output. The effects return from the Sansamp splits again, with one output going directly to the bypass switch and the other going to a mixer to combine the dirt. The output from this mixer also goes to the bypass switch, giving the option of pure Sansamp or Sansamp plus dirt. Simple.
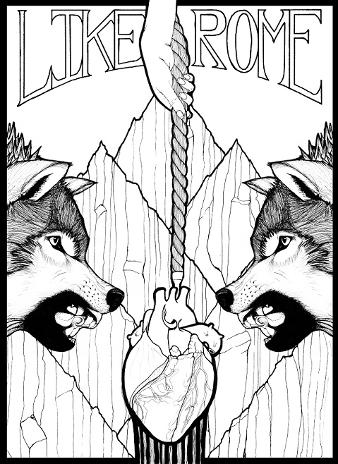

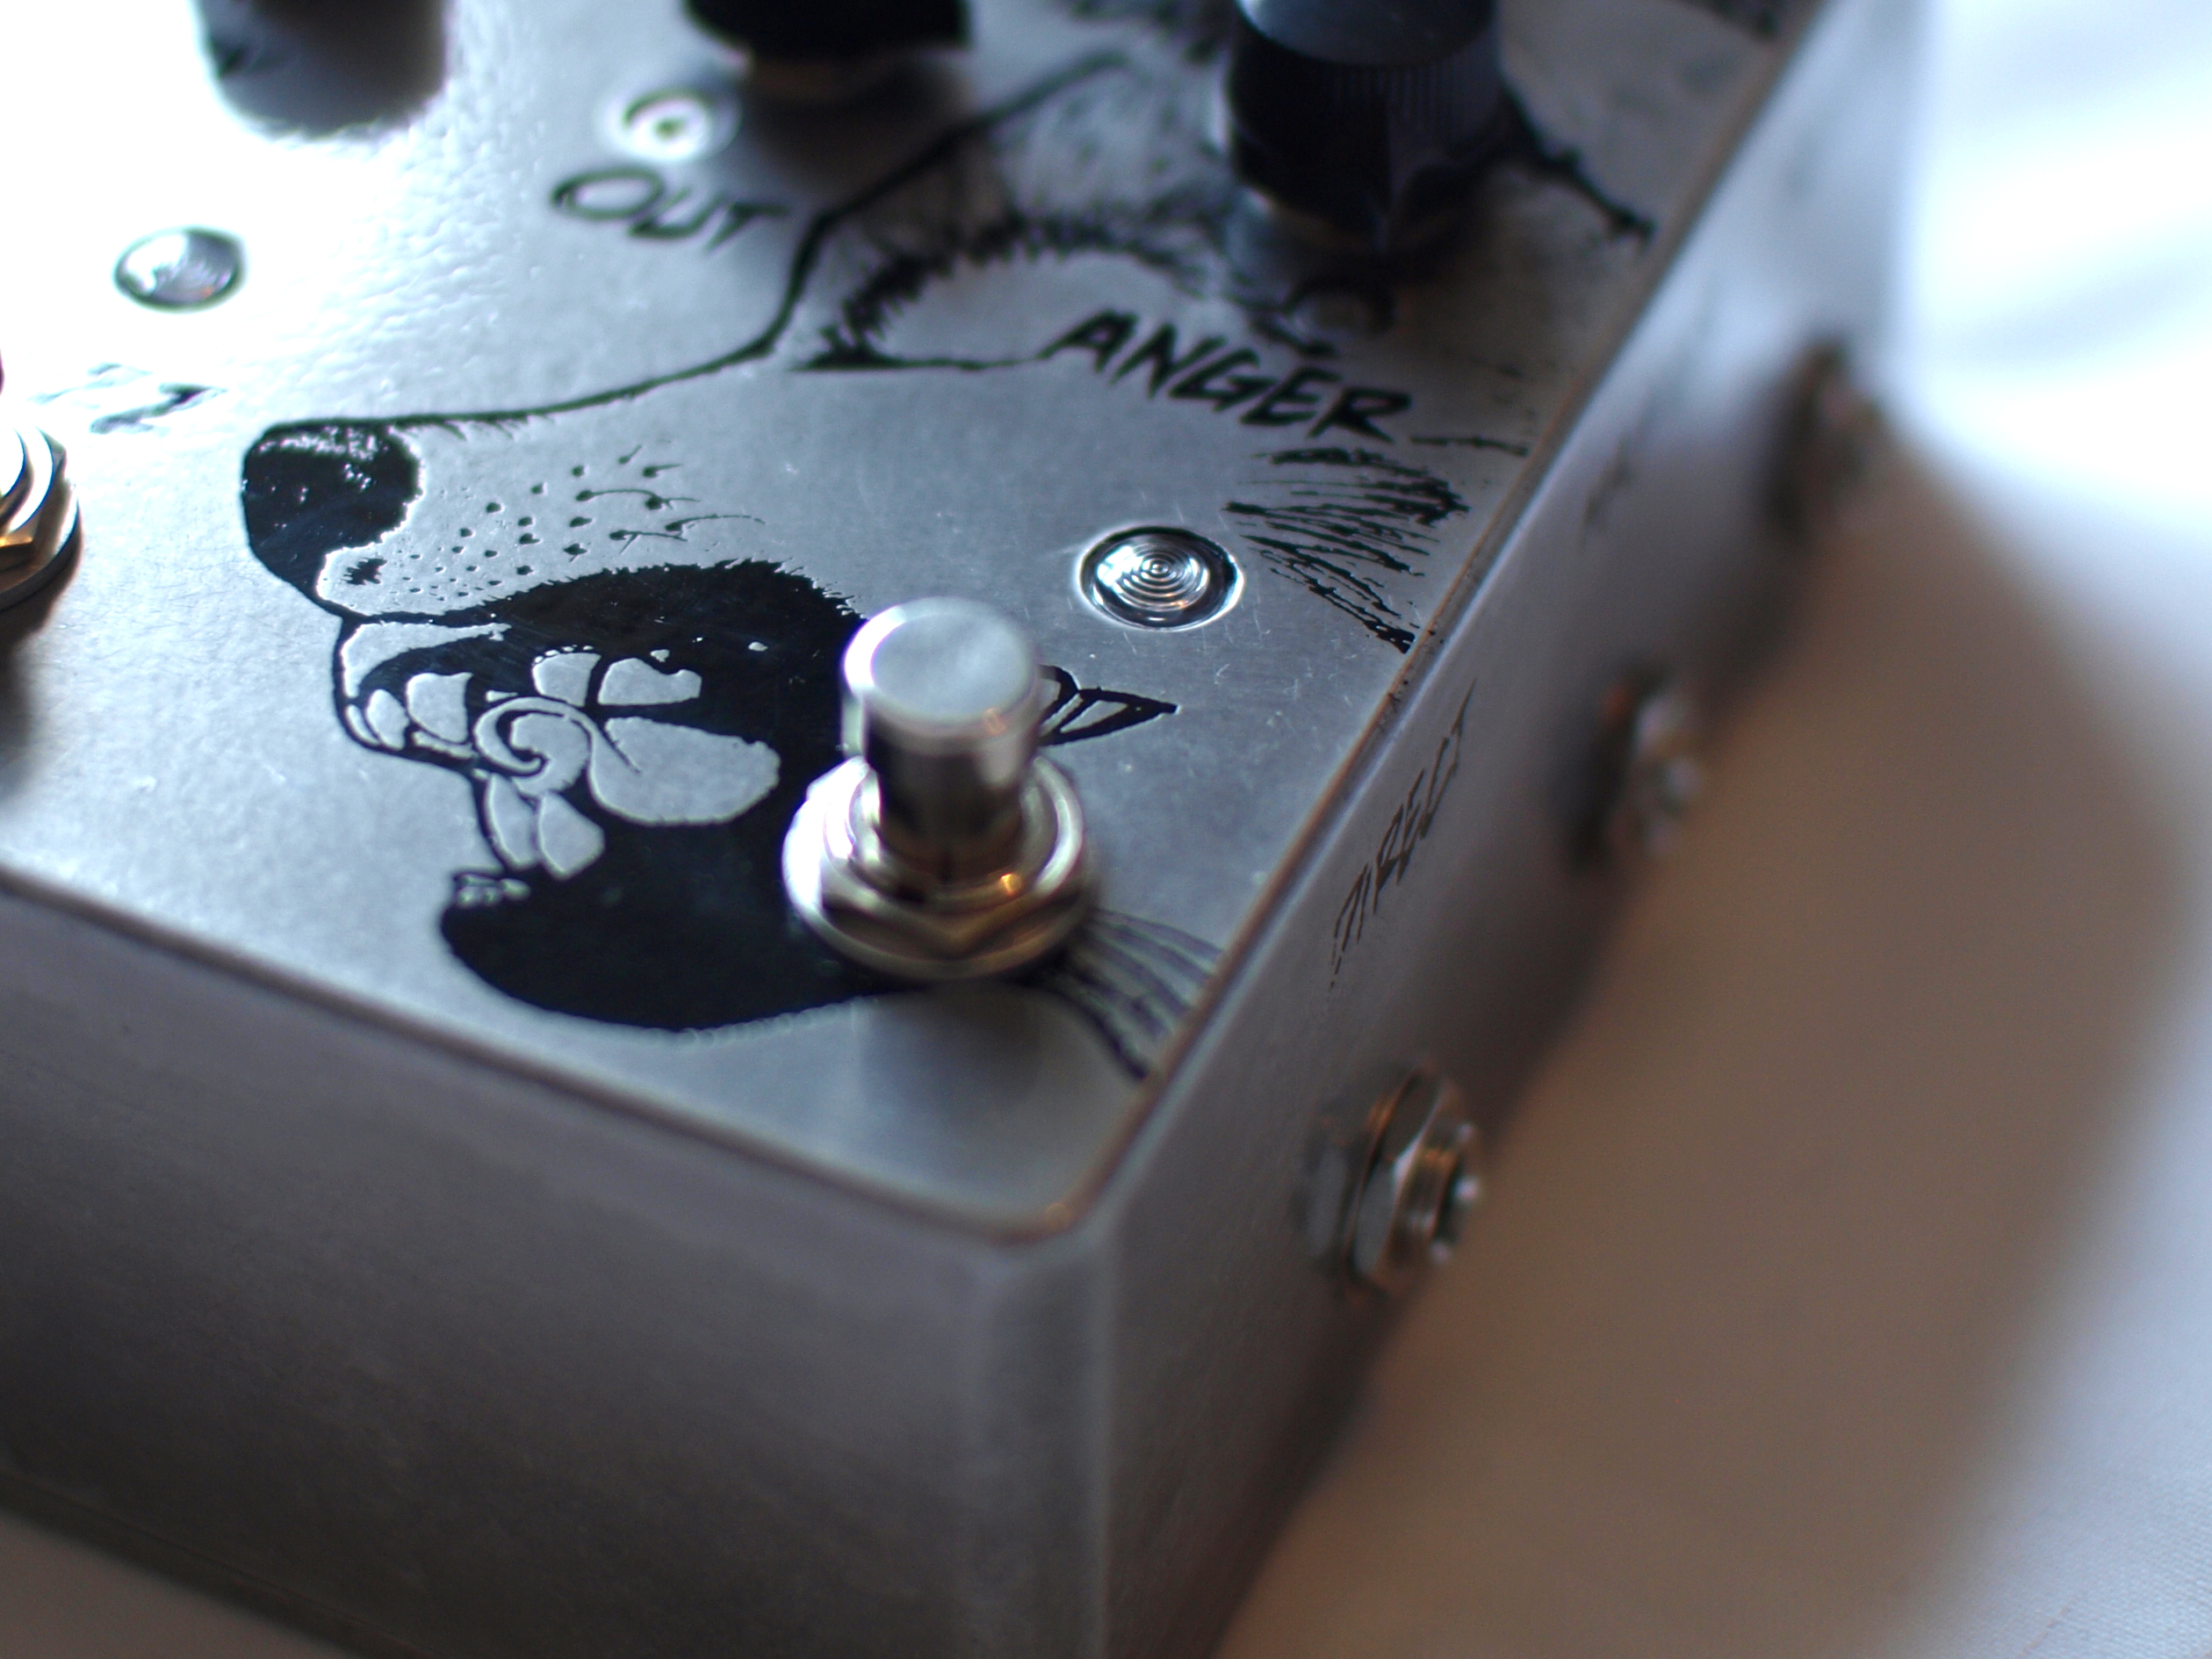
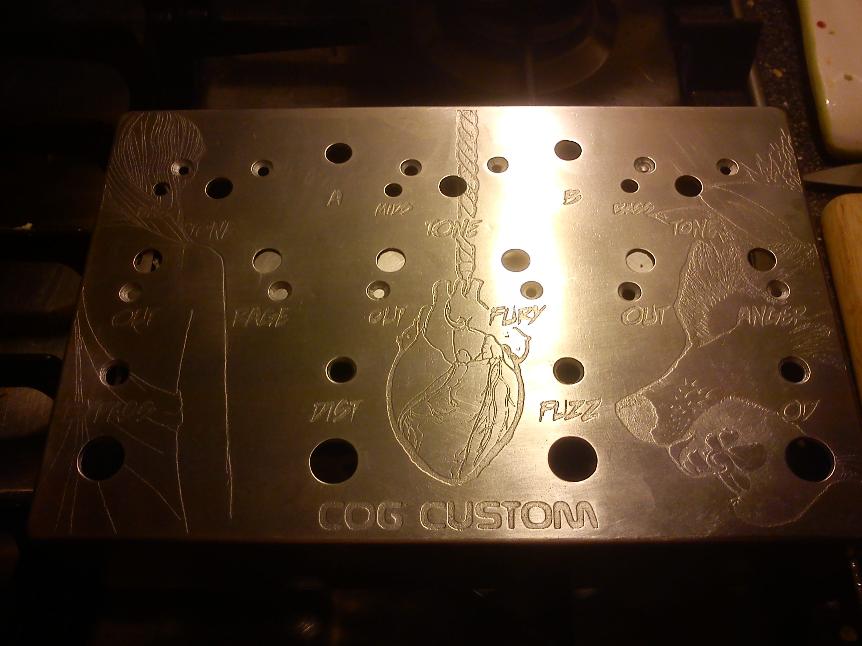
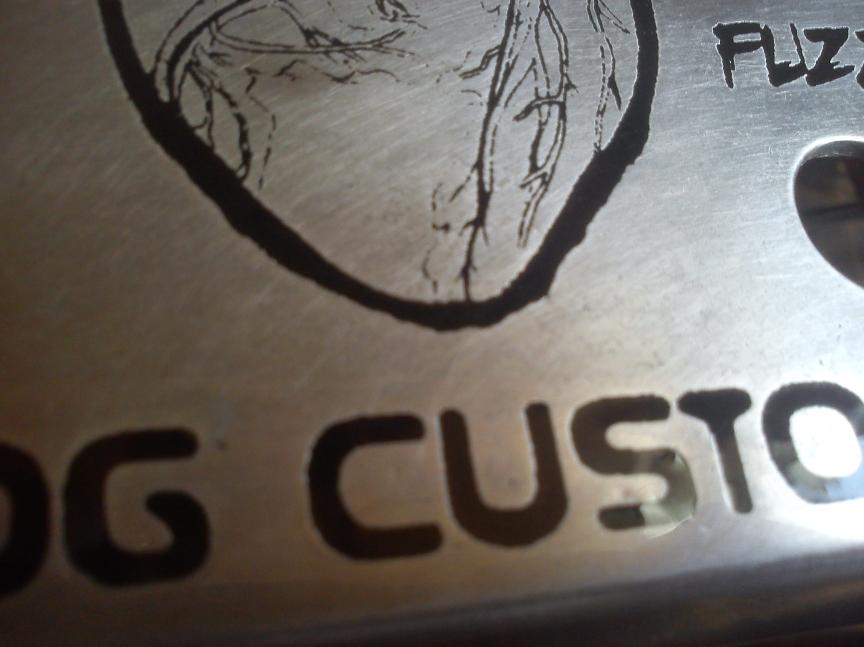
A large enclosure was picked for this project and that meant more space for artwork! Enter Sheffield artist and all-round good guy Mr Jay Kerr.
Jay is responsible, amongst other things, for the artwork for Like Rome, and his style suited the results that we achieve using our acid etching process. For this pedal, Jay took elements of two of his pieces for Like Rome to create a fantastic one-off image. Jay's website is currently in development.
Once the artwork and pedal layout were confirmed, the process of acid etching could begin. This process is the same for all Cog etched boxes, and is borrowed from the manufacture of Printed Circuit Boards (PCBs) and adapted to the aluminium boxes we use. The acid can't eat through common laser printer toner, and we can use this to create the artwork you see on our etched boxes.
The artwork and drill points are inverted and mirrored before being printed onto toner transfer paper (commonly called "press'n'peel"). We want to protect the areas that are not to be etched, hence the colour inversion, and the toner will be transfered to the box with the paper toner-side down, hence the mirroring of the image.
The image is produced in monochrome, any colour can be added at the painting stage, as can a translucent paint for the background colour. For this design, a simple black-on-metal look will produce the most striking result.
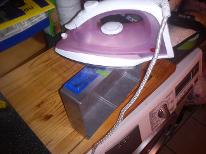
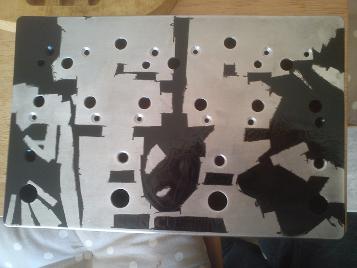
Once printed, we must prepare the box for the toner transfer. For the cleanest possible transfer we need the box to be as smooth and clean as possible. An uneven or oily surface will prevent the toner from bonding with the box and will lead to a poor transfer. If you have a poor transfer you're gonna have a bad time. First up, we clean the box and rub it down with alcohol to remove the surface grime. We then wet sand the box through the sanding grits up to 1200 to achieve a smooth and even finish. Another wash and clean with the alcohol and we are ready to go. The toner transfer needs heat, and the best way to heat up a metal box is by direct conduction. We use the highest of high-tech gear for this.... an iron. Not the good iron for workshirts though, so if you're thinking of doing this yourself make sure you pick up a spare or you will ruin a perfectly good iron.
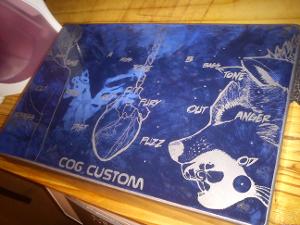
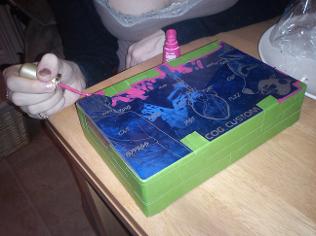
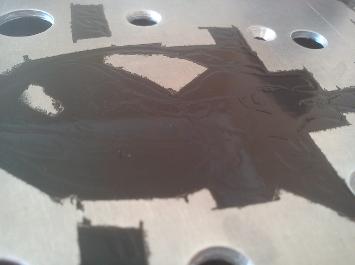
To the left is the box once toner transfer is complete. Good preparation is key to getting a good transfer. Now we need to mask the remaining areas of the box that we do not want to be etched. This is done using masking tape and good old nail varnish. Don't use your wife's best nail varnish for this as the results will be bad. The box will etch really well, but your nuts will hurt an awful lot more.
Light in the Cog Effects Specialist Etching Unit (our cellar) is pretty poor, so there are no photos of the actual acid etch right now. Suffice to say, it looks like a box, covered in tape, upside down in a tray of brown liquid, which is in a larger tray of water.
For those after a slightly more technical explanation... We use a tray of boiling water to heat up a slightly smaller tray of Ferric Chloride. Once the acid is warm, we place the masked box face-down in the acid for a period of 7-9 minutes (depending on the size and complexity of the artwork). The box is then stripped and cleaned to remove all excess acid. Ferric Chloride is horrible stuff, so don't be wearing your Sunday best, and always wear gloves. Dispose of the stuff responsibly as well!
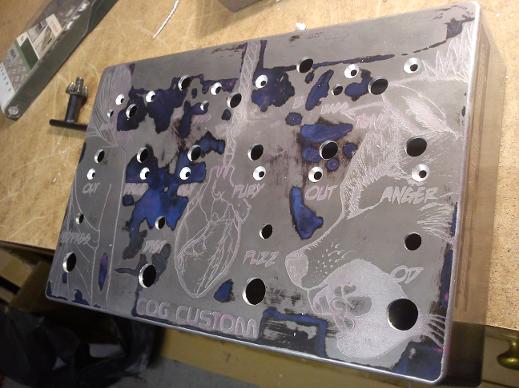
Once you've got the box clean and free of the acid and excess etched metal it is time to drill. Not a great deal to say here. Drilling is just boring really. Some of you will get that joke.
To the right the box has been etched, roughly cleaned, and is part-drilled. No need to fully clean all the toner off before drilling as it will get a very thorough clean prior to painting. Just make sure the acid and excess metal is gone.
Several grades of wire wool and wet sanding later and we have the box almost ready for painting. Another clean with alcohol and we are ready for paint.
Black paint on, masking off, a bake in the Cog Effects Specialist Paint Baking Unit (toaster oven in our shed) and now we're ready for sanding. More wet sanding through the grits for a smooth and even finish.
After sanding down, we are finally left with the artwork showing through. A couple of spots to touch up and then we are ready for clear coat.
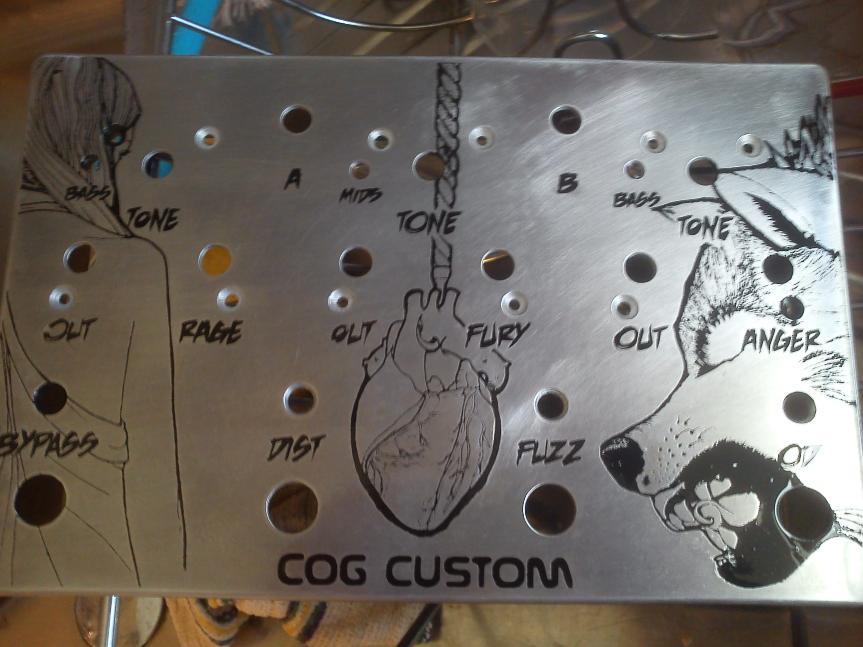
Vein detail on the heart
Back of the box
From then on, it is clear coat, bake, sand, clear coat, bake, sand, repeat repeat repeat for a durable coat that will protect the pedal.
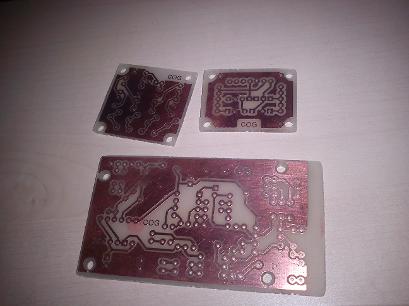
Next up: PCBs for the signal routing, power filtering and LED displays. These are produced using largely the same process as described above and the internet is full of tutorials so we shan't go any further... so.....
Here's some we made earlier! Etched and drilled PCBs waiting for final cutting and sanding. Note a small trace on the largest board in need of a bit of TLC. This is repaired prior to circuit assembly.
The PCBs are then painted and populated before having a protective coat of lacquer applied to the copper layer to ensure long life.
From here the process is simply final assembly of all the component parts to produce the end result. This is largely self-explanatory in the pictures below, but as with everything else to do with Cog, feel free to get in touch for any info!
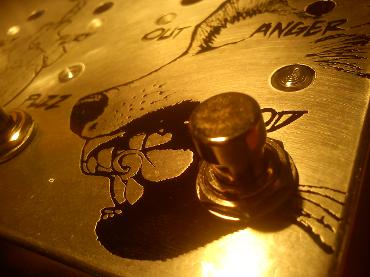
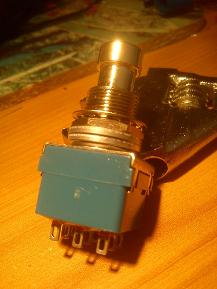
Switches are mounted as far into the box as possible to prevent lateral movement when switching for longer life.
Metal washers and internal locking washers throughout.
Recessed LED lenses to prevent damage when stomping on the switches.
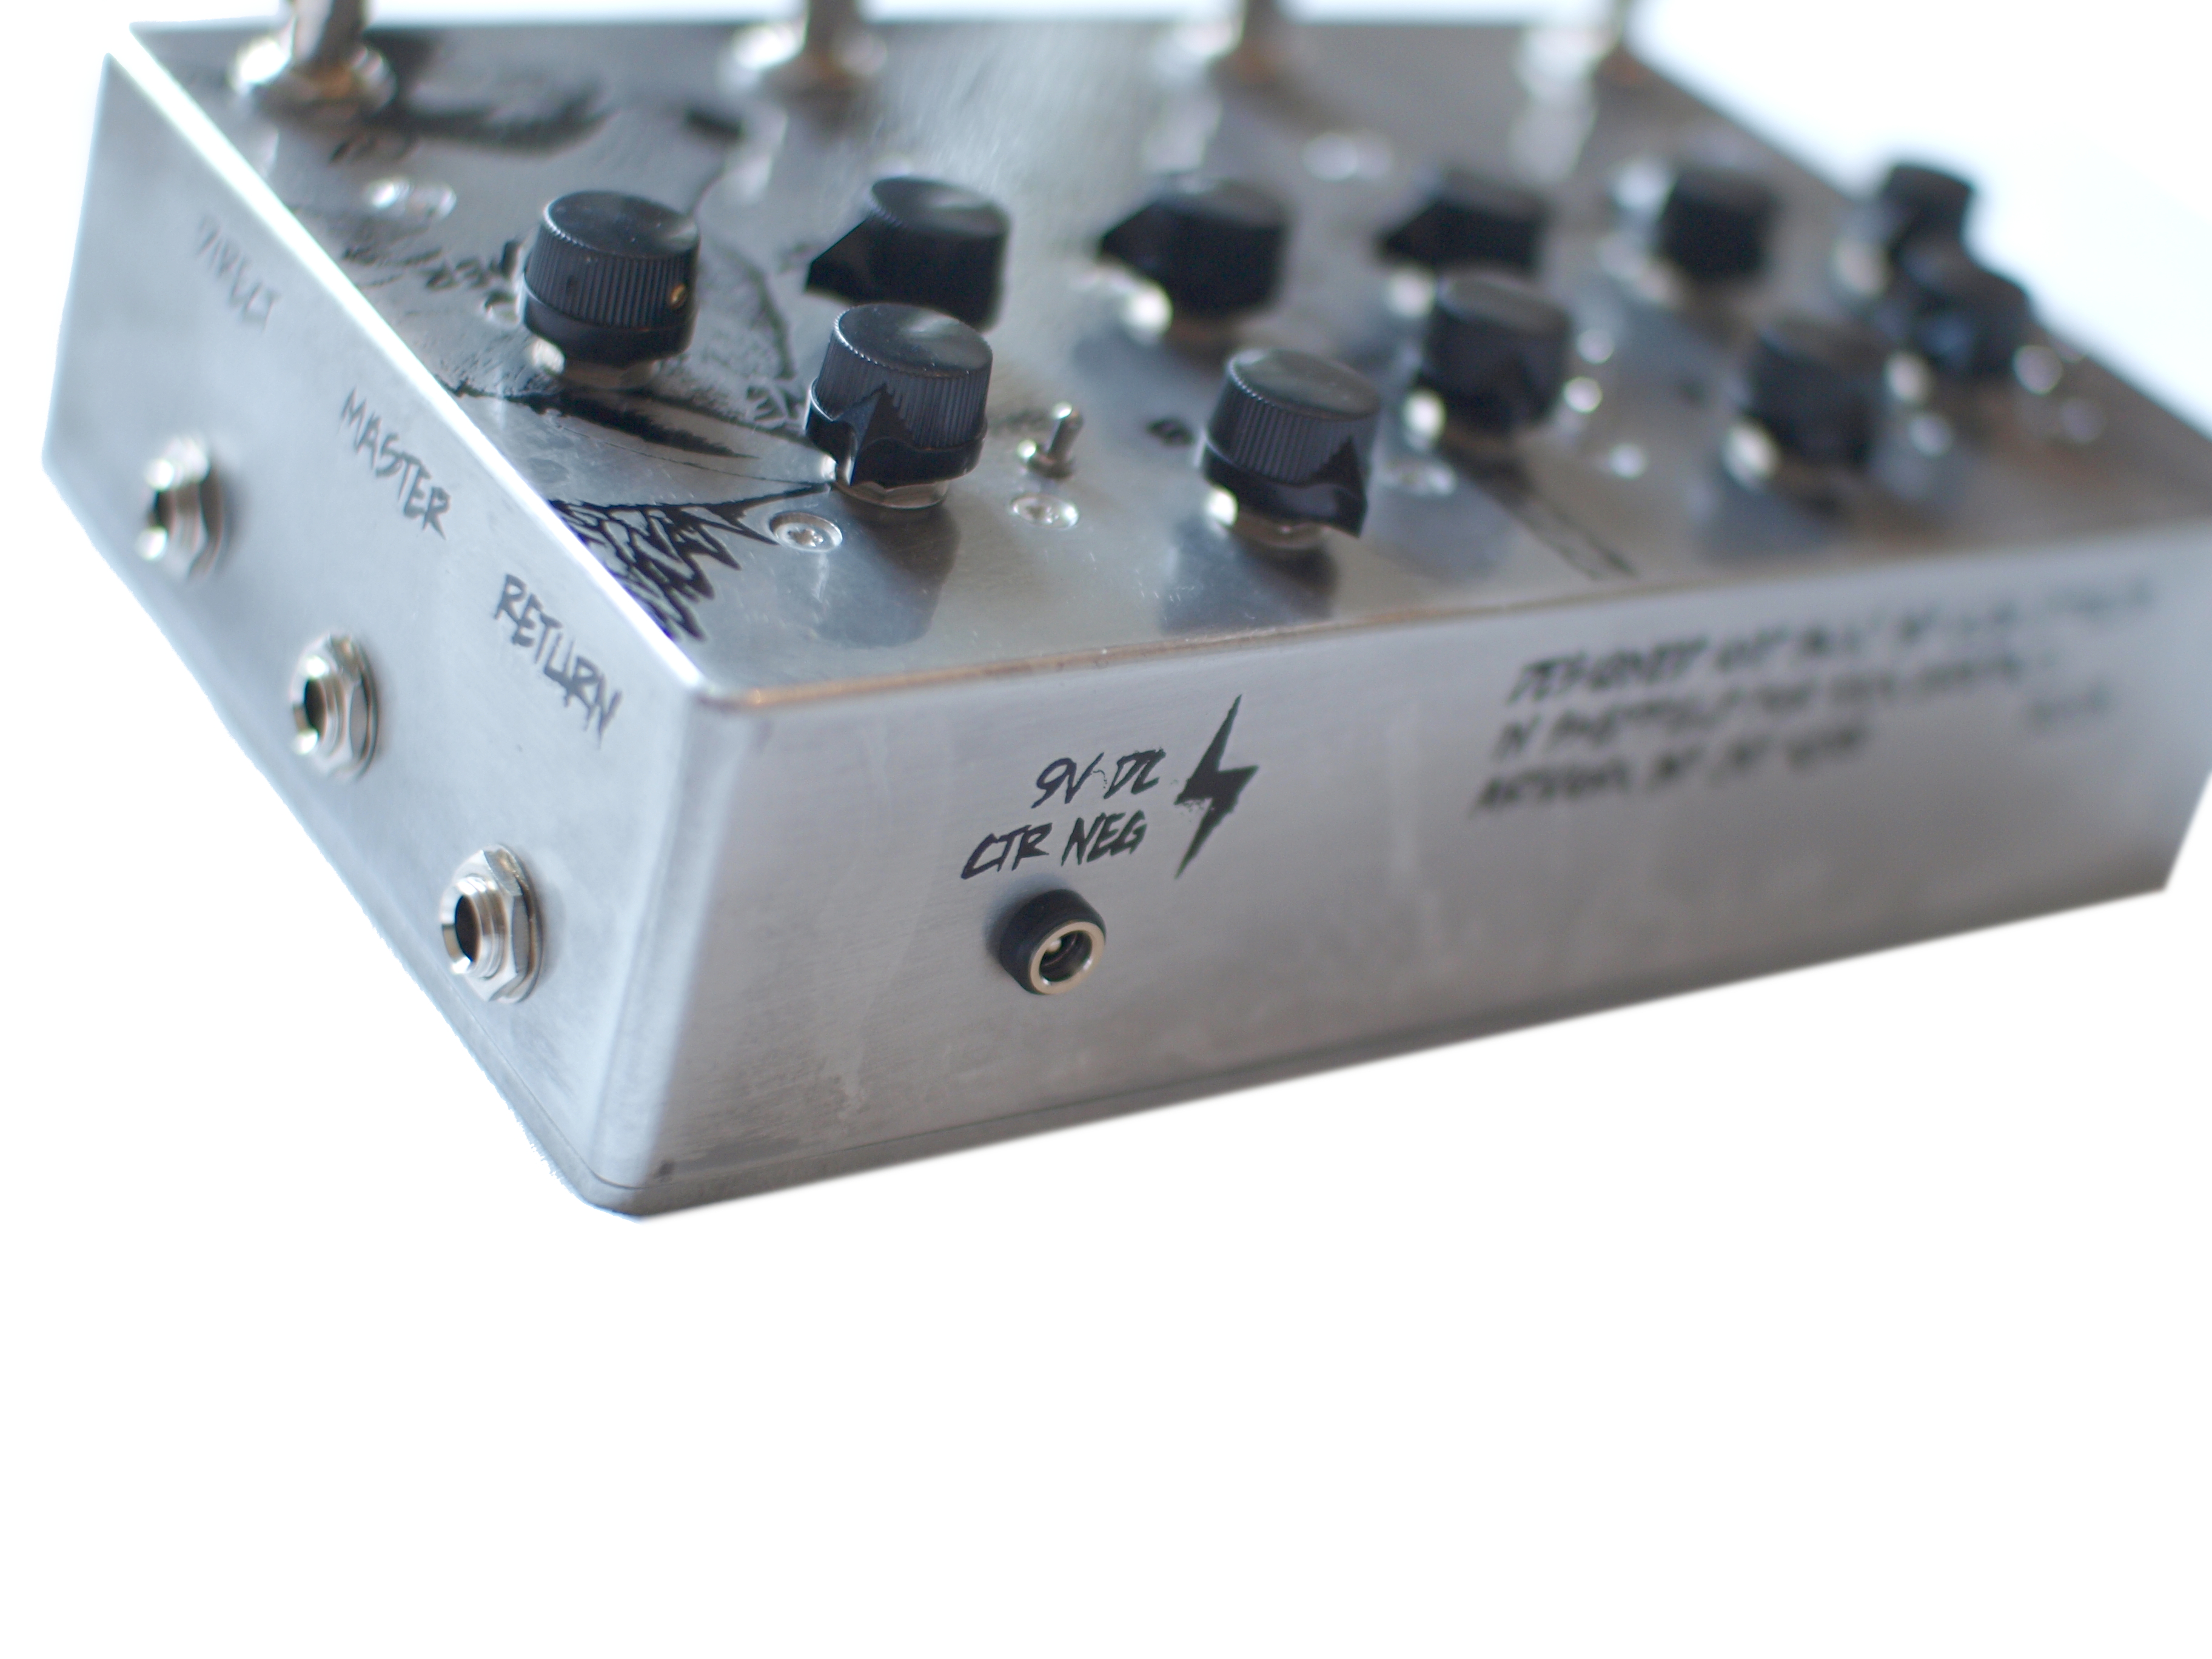
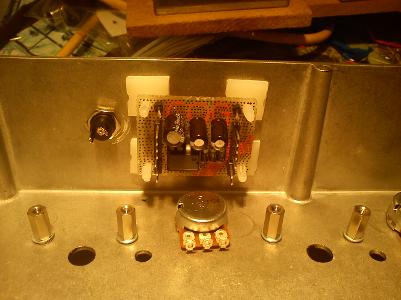
Power supply filtering board and charge pump. Most of this box runs on higher voltages for more headroom. The charge pump takes the voltage up to 17.3v.
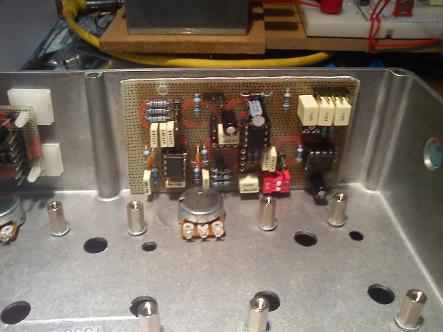
Signal buffering and routing board.
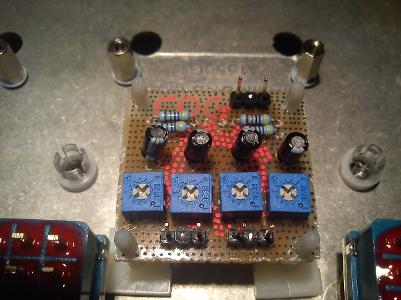
LED Power Distribution board. Trimpots control the brightness of the LEDs.
Darklighter, Tarkin and Knightfall PCBs mounted to the box using brass supports.
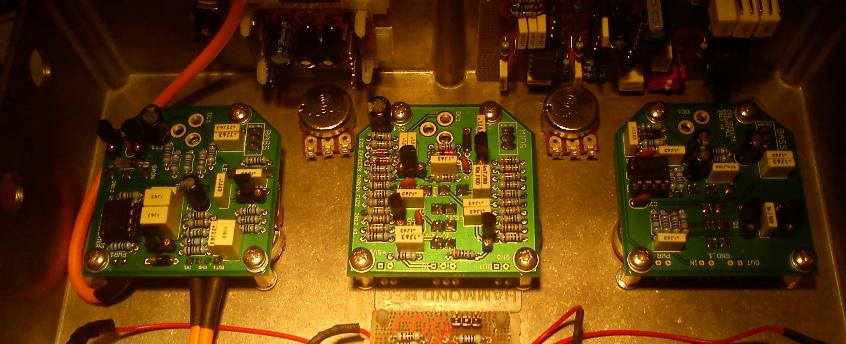
Wiring begins. Massive gains in this box mean shielded cable is a winner to reduce unwanted noise.
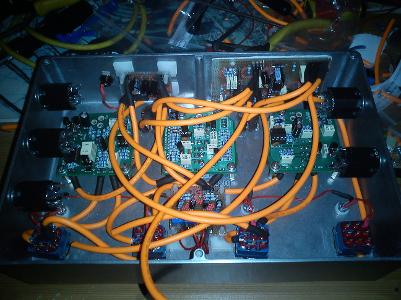
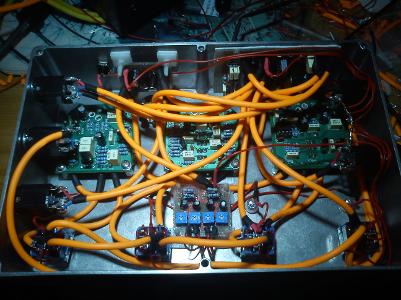
Wiring complete. Power cables running perpendicular to signal cables in places where they must be in close proximity. Ground wires in red. Eyes tired. Bed time.
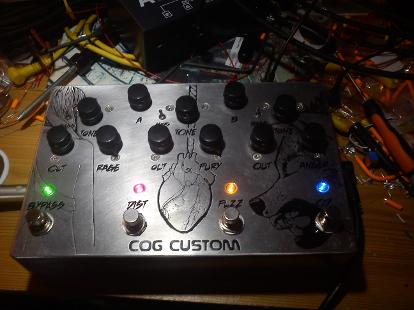
Final picture you will see taken on my terrible phone camera. The finished product!
Hopefully you have enjoyed reading this build diary, feel free to contact us with any questions!
This site uses cookies. For more information, please read our Privacy Policy.